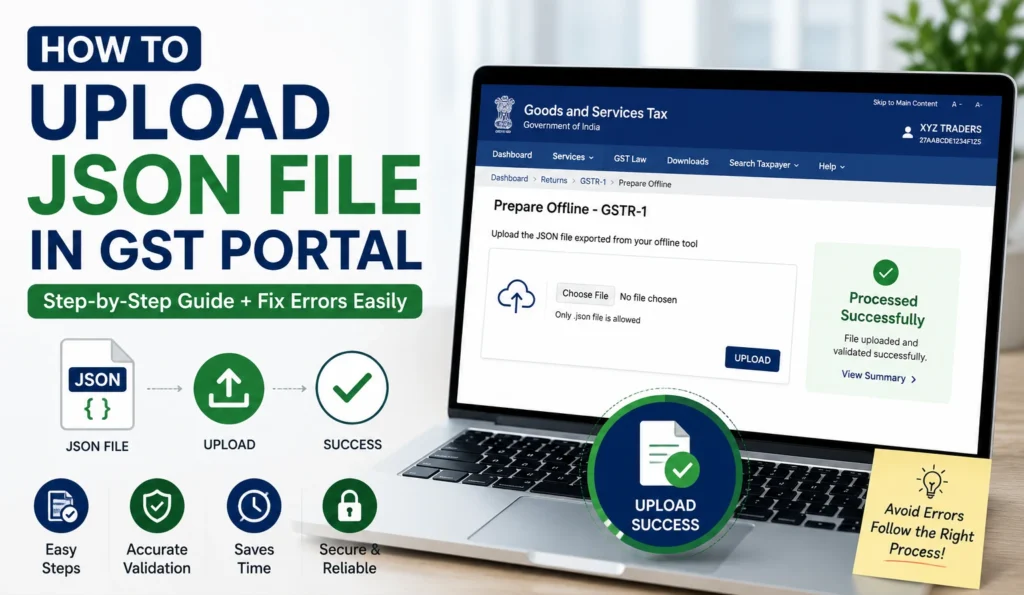
If you’ve ever generated a GSTR-1 JSON file, uploaded it, and then stared at a “Processed with Error” status for twenty minutes wondering what you did wrong, you’re not alone. The upload step looks simple on paper. It’s the part after clicking “Choose File” that trips people up: validation delays, mismatched invoice data, JSON files that were generated before a portal update and silently won’t work anymore.
This guide walks through how to upload a JSON file in the GST portal, what actually happens during processing, and how to fix it when the portal throws an error instead of a green checkmark.
This guide focuses primarily on GSTR-1 uploads, since it’s the most commonly filed GST return that relies on JSON files. The same broad steps apply to other returns like GSTR-4, but tile locations, file formats, and error-handling details can vary depending on the return type and the offline utility version you’re using.
Page Contents
Before You Upload: Where Does the JSON File Come From?
You don’t create a JSON file inside the GST portal. It’s generated elsewhere first, usually one of these:
- The government’s official Offline Utility tool (Excel-based, free)
- Accounting software like Tally, Busy, or ERPNext with GST export built in
- GST filing platforms like LEDGERS or myBillBook, which generate return-ready JSON from your invoice data
Whichever source you use, the file needs to match the structure the GST Network expects for that specific return type. A GSTR-1 JSON won’t work on a GSTR-4 tile, and a JSON built before a schema change can get rejected outright with no useful error message. If your file is more than a few months old, regenerate it rather than reusing it.
Step-by-Step: Uploading the JSON File
1. Log in to the GST portal Head to gst.gov.in and sign in with your credentials.
2. Go to the Returns Dashboard Navigate through Services > Returns > Returns Dashboard.
3. Select your filing period Pick the correct Financial Year and Return Filing Period (this will be a month or a quarter depending on your filing frequency), then hit Search.
4. Click Prepare Offline on the right tile Each return type (GSTR-1, GSTR-4, and so on) has its own tile. Don’t upload a GSTR-4 file into a GSTR-1 tile. Uploading the wrong return type usually results in validation errors or a failed upload.
5. Choose your file Click “Choose File” and select the JSON file from your computer. Follow the on-screen instructions to upload the file. Depending on the return type and interface, you may need to click an additional upload or submit button.
6. Wait for processing This is where most of the anxiety happens. The portal needs time to validate every line item. Don’t refresh repeatedly and don’t re-upload just because nothing’s changed after a few minutes. Processing may take anywhere from a few minutes to considerably longer during peak filing periods, so give it time before assuming something’s wrong.
What Happens After Upload
Once processing finishes, you’ll land in one of two places:
Success. Your invoice data populates the relevant tables on the dashboard. You can click into each section to review what got uploaded before you file anything.
Processed with Error. Some or all of your records failed validation. Here’s exactly what to do next, step by step. This part is longer than most guides bother with, but skipping steps here is exactly how people end up stuck re-uploading the same broken file three times.
Fixing a “Processed with Error” Upload
Step 1: Generate the error report. On the tile showing the error status, click “Generate error report.” This kicks off report creation on the portal’s end. It’s a separate action from the upload itself, and it can take a few minutes to build. Don’t click it repeatedly if nothing happens right away.
Step 2: Download the error report. Once it’s ready, a “Download error report” link appears. Click it. The file comes down as a .zip, not a plain JSON, so save it somewhere you’ll remember. Ideally next to your original offline tool file.
Step 3: Extract the zip file. Right-click the downloaded .zip and choose “Extract All” (or your OS’s equivalent). Pick a folder to extract into and confirm.
Step 4: Check what’s inside. The downloaded package may contain one or more files, depending on the return type and the portal version. Typically you’ll find a file with the records that failed validation and their specific errors, and a separate file for whatever processed successfully. You’ll usually need both for the next step, not just the error file.
Step 5: Open your offline tool. Go back to the same Offline Utility (or accounting software export tool) you used to generate the original JSON. Open it and go to the Home tab.
Step 6: Load the error files into the tool. Look for a section called something like “Error File Handling,” and click “Open Downloaded Error JSON Files.” A file picker opens. Select the relevant files from the extracted folder together, and confirm. The tool needs them to reconcile what succeeded against what didn’t.
Step 7: Confirm the import worked. You should get a success message. Click OK to proceed.
Step 8: Review each worksheet. Go through every worksheet tab in the tool. Both your successfully processed records and your error records will now be visible, split across different sheets. This is where you actually see which invoices got flagged and why.
Step 9: Read the error column and fix the data. Each error row will have a column (usually labeled something like “GST Portal Validation Errors”) explaining what’s wrong: a GSTIN mismatch, a duplicate invoice number, a date outside the filing period, that kind of thing. Correct these directly in the sheet.
Step 10: Validate the sheet. After making corrections, click “Validate Sheet.” Do this for each worksheet you touched, not just once at the end.
Step 11: Confirm validation. A pop-up confirms successful validation. If it doesn’t pop up, something on that sheet is still wrong. Go back and check before moving on.
Step 12: Refresh the summary. Click “Get Summary” to pull your corrected numbers into the Home tab summary view. This summary won’t calculate late fees or interest for you, by the way. It’s just a tally of what’s in the sheets.
Step 13: Generate a fresh JSON file. Once everything validates clean, use “Generate JSON File to Upload” to create a new file with your corrections baked in.
Step 14: Re-upload. Go back to the GST portal, same tile, same “Prepare Offline” flow, and upload this new file. It replaces what was there before. The portal overwrites rather than stacking your first, broken attempt on top of it.
People sometimes re-upload the same original broken file a second time, assuming the first attempt just glitched. In most cases it hasn’t. If the file is genuinely wrong, you’ll likely get the identical error report again, costing you another processing wait for nothing. Run the file through the correction loop above first.
You can also upload a corrected JSON as many times as you need before final submission. Each new upload simply overwrites the previous one on that tile. Just don’t treat “upload again” as a substitute for actually fixing the flagged rows.
Common Reasons Uploads Fail
- Delinked credit/debit notes. If your JSON was generated before the CDN delinking update, it typically won’t upload. You’ll need to redo the entries manually in the newer offline utility, since older JSON files generated before that change are usually incompatible.
- GSTIN mismatches. A supplier or recipient GSTIN that doesn’t match what’s registered will bounce the whole record.
- Duplicate invoice numbers within the same period.
- Wrong return period selected on the dashboard before uploading. An easy mistake when you’re filing for multiple months back to back.
Also Read – GSTR 1 JSON to Excel Converter: Free, Quick, No Sign-up 2026
Final Submission
Once your data shows up clean on the dashboard (no pending errors, everything in the right tables), go back to the online return and review the auto-populated figures. This is your last chance to catch something before it’s official. File using your EVC (OTP-based) or DSC (digital signature), depending on how your business is registered.
FAQ
Can I upload JSON files in parts instead of one full return? Yes, for GSTR-1 you can upload separate JSON files for B2B invoices, B2C large, B2C small, exports, HSN summary, and amendments individually rather than one combined file. Useful if you’re correcting just one section without touching the rest.
How long before uploaded data actually shows up on the portal? Usually within 15 to 30 minutes, though it can take longer during high-traffic filing periods near deadlines. If it’s been well over that with no change, something likely failed silently. Check the tile status before re-uploading.
Is it mandatory to file GST returns using JSON, or can I enter everything manually? You can enter data manually on the portal for smaller volumes, but once you’re past a couple dozen invoices a month, manual entry stops being practical and JSON upload becomes the more reliable option.
What if the error report itself won’t generate? Wait it out. Report generation is sometimes slower than the upload processing itself. If it’s stuck for over an hour, that’s usually a portal-side issue, not something on your end.
Can I file for multiple GSTINs using the same JSON workflow? Each GSTIN needs its own login, its own dashboard session, and its own JSON file. There’s no batch upload across GSTINs from a single session.