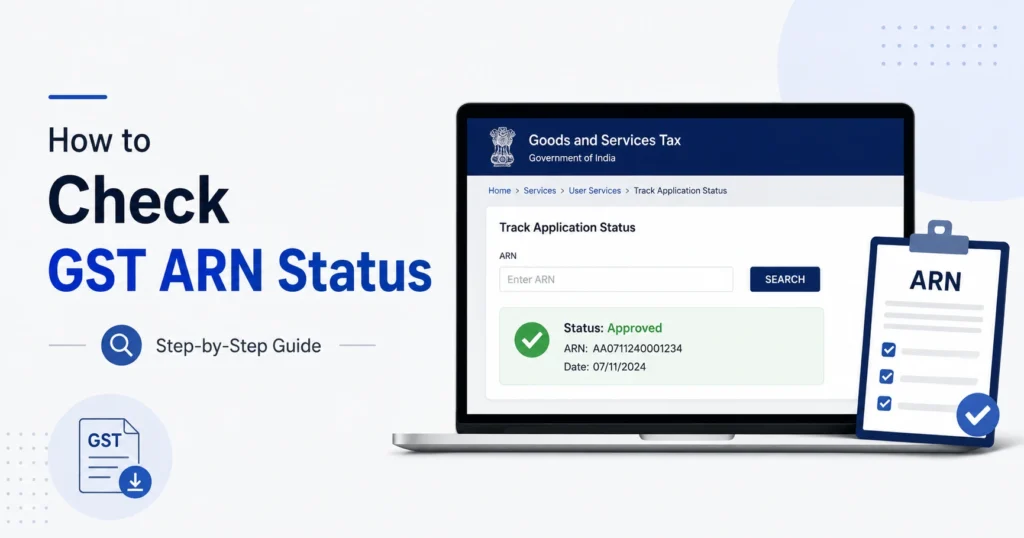
To check your GST ARN status, go to the GST portal, click Services, then Track Application Status, select Registration, enter your ARN and the captcha, and hit Search. Your status appears instantly. No login needed. Here’s the full walkthrough, what each status means, and what to do if yours is stuck, pending clarification, or rejected.
Page Contents
How to Check GST ARN Status Without Login
This is the fastest way to check, and it works for a first-time registration application.
- Go to the official GST portal at gst.gov.in
- Click Services, then Registration, then Track Application Status
- From the Module dropdown, select Registration
- Enter your 15-character ARN exactly as it was sent to your email and mobile (no spaces, all capitals). If your application came through the MCA portal instead, you’ll have an SRN (Service Request Number) rather than an ARN, and you can search by that instead
- Type the captcha shown on screen
- Click Search
Your current status appears on the same page, along with the stage your application is at. You can click the ARN itself to download your acknowledgment as a PDF.
A quick note on the ARN: it’s case-sensitive and has no spaces or hyphens. If the portal says “invalid” or “not found,” retype it carefully before assuming something’s wrong. If your ARN was generated in the last hour, give it a little time. There can be a short sync delay between submission and status tracking going live.
How to Track ARN Status After Logging In
Logging in is worth it if you’re tracking more than one application, or if you’re checking on something other than a first-time registration.
- Log in to the GST portal with your credentials
- Go to Services, then Track Application Status
- Select Registration from the Module dropdown
- Search by ARN, by SRN, or by the submission date (useful if you’ve filed several applications and don’t have every ARN handy)
This view also shows a color-coded progress bar: completed stages appear in green, and whatever’s left is greyed out, so you can see at a glance how far along you are.
Tracking a Draft Application with TRN
If you haven’t finished submitting your application yet, you won’t have an ARN. You’ll have a TRN (Temporary Reference Number) instead, and that’s a different tracking flow.
- Go to Services, then Registration, then New Registration
- Select the Temporary Reference Number (TRN) option
- Enter your TRN and the captcha, then click Proceed
- Enter the OTP sent to your mobile and email (valid for 10 minutes)
- You’ll land on the My Saved Application page, which shows your draft’s status under the Status column
A TRN is only useful before you’ve submitted Part B of your application. Once you submit, the portal replaces it with an ARN, and from that point on, the ARN is what you use to track things, not the TRN. Also worth knowing: a TRN expires 15 days after it’s issued if you never complete and submit the application, so don’t let a draft sit too long.
ARN Isn’t Just for New Registration
Most people checking ARN status are tracking a fresh registration, but the portal issues an ARN for several other applications too, and each one has its own typical timeline.
| Application Type | Form | Typical Turnaround |
|---|---|---|
| New registration | REG-01 | 3 to 7 working days (with Aadhaar authentication) |
| Amendment to core details (legal name, business address, adding/removing a partner) | REG-14 | Up to 15 working days |
| Cancellation of registration | REG-16 | Around 30 working days, often faster for simple voluntary cases |
| Revocation of a cancelled registration | REG-21 | Tracked separately from the original registration ARN |
| Refund applications | Various | Follows its own statutory refund timeline, tracked under the Refunds module |
If you’re checking status for an amendment or cancellation rather than a new business, the process is the same (Services, then Track Application Status), just make sure you’re using the ARN for that specific application, since each one gets its own.
What Each GST ARN Status Means
Here’s every status you’re likely to see, what it actually means, and how urgently you need to act.
| Status | What It Means | What You Should Do | Urgency |
|---|---|---|---|
| Pending for Processing | Your application is in the queue, waiting for an officer to review it | Nothing. This is normal. | None |
| Pending for Clarification | The officer has a question or wants a correction | Log in and file your response within 7 working days | High |
| Clarification Filed – Pending for Order | You’ve replied, and the officer is reviewing your response | Wait. Nothing more to do right now. | Low |
| Clarification NOT Filed – Pending for Order | You missed the 7-day deadline to respond | Contact the GST helpdesk immediately, rejection is likely | Very high |
| Site Verification Assigned | An officer is coming to physically check your business address | Keep your premises, signage, and documents ready | Medium |
| Site Verification Completed | The inspection is done, the report is with the officer for a final call | Wait for the decision | Low |
| Approved | Your GSTIN has been issued | Download your registration certificate from the portal | None, you’re done |
| Rejected | The officer denied the application | See the section below | High |
| Withdrawn | You voluntarily pulled the application before a decision was made | Reapply whenever you’re ready, no penalty attached | None |
A quick note if you’re comparing this to something you read elsewhere: some older articles list statuses like “Provisional,” “Migrated,” or “Validation Against Error.” Those were specific to the 2017 GST rollout and migration period, and they don’t apply to the portal as it works now. If you see one of those terms on an older page, it’s outdated, not a status you’ll actually encounter today.
How to Respond to a “Pending for Clarification” Notice
This is the one status that actually needs urgent action, so it’s worth walking through properly.
- Log in to the GST portal
- Go to Services, then Registration, then Application for Filing Clarifications (or find it under My Saved Applications)
- Enter your ARN or the notice reference number, and click Search
- Open the officer’s query and read it carefully
- Fill in your response in the Query Response box (this is mandatory)
- Upload whatever supporting document the officer asked for, clearly scanned, not blurry
- Add anything extra in the Additional Information field if it helps your case
- Tick the verification checkbox, select your authorized signatory, and enter the place you’re filing from
- Submit using DSC (digital signature) or EVC (OTP-based)
You have exactly 7 working days from the date the notice was issued, not from the day you happened to read it. So the earlier you check your status after applying, the more buffer you give yourself.
A clarification notice usually gets triggered by one of a few specific things: an old electricity bill or utility document (the portal expects a recent one), a mismatch between the address on your consent letter or NOC and the one on your supporting proof, promoter or director details that don’t line up with the PAN or Aadhaar database, or documents that are blurry or hard to read. A less obvious one worth checking before you submit: the portal has file size and format limits on uploads, generally JPEG or PDF, with most documents capped around 100 KB and select proofs allowed up to 1-2 MB, so an oversized or wrong-format scan can quietly cause the same kind of query. Catching these before you submit saves you this whole detour.
What Happens If Your Application Is Rejected
A rejection comes through as an official order (Form REG-05), and it has to state the reason. You have two real options from here, not just “start over.”
File a fresh application. There’s no mandatory waiting period. If the rejection came down to a fixable issue, wrong address proof, a document mismatch, incomplete details, this is usually the faster route. Read the rejection order carefully first, fix everything it names, and get updated documents (a fresh electricity bill, a corrected name matching your PAN) before you resubmit.
Appeal the decision. If you believe the officer rejected the application despite you submitting everything correctly, you can appeal under Section 107 of the CGST Act, within 3 months of the rejection order (extendable by 1 month if needed). This is filed on the portal under Services, then User Services, then My Applications, then Appeal to Appellate Authority. You’ll need the rejection order itself, a written explanation, and your original supporting documents.
In practice, reapplying with corrected documents is quicker for most people. The appeal route makes more sense when you’re confident the rejection itself was the mistake, not your paperwork.
How Long Does Each Stage Take
Rough timelines, assuming no complications:
- ARN generation: instant, within minutes of submission
- Pending for Processing (standard, with Aadhaar authentication): 3 to 7 working days
- Pending for Processing (Rule 14A fast track, if eligible): as little as 3 working days
- Pending for Processing (without Aadhaar, needs site visit): up to 30 working days
- Clarification response window: 7 working days, non-negotiable
- Officer’s decision after clarification filed: another 7 working days
For the eligibility rules behind the Rule 14A fast track, and how the deemed-approval safeguard works if an officer doesn’t act in time, we’ve covered that in detail in What is ARN in GST: Full Form, Meaning, and How Long It Takes.
After Approval: Download Your Certificate and Verify Your GSTIN
Once your status shows Approved, there are a few things left to do, not just one.
- Log in to the GST portal using the credentials sent to your email
- Go to Services, then User Services, then View/Download Certificates, and download your registration certificate (Form REG-06)
- Separately, go to Search Taxpayer, then Search by GSTIN/UIN, enter your new GSTIN, and confirm your business name, address, and status show correctly and as Active
- Link a valid bank account to your GSTIN within 30 days of approval, or before filing your first GSTR-1, whichever comes first. Missing this window can lead to your account being suspended, so it’s worth doing early rather than leaving it for later.
That second step matters more than people expect. Suppliers and customers will often run this same check before accepting your invoices for their own input tax credit claims, so it’s worth confirming your details are showing up correctly from day one.
What to Do If You Never Received Your ARN
Occasionally the ARN doesn’t show up in your inbox at all, which is a different problem from a status that isn’t updating.
- Check your spam or junk folder first. This is the most common reason.
- Log in to the GST portal and check My Saved Applications under the Registration tab. Your ARN will be listed there even if the email or SMS never arrived.
- Wait a short while if you just submitted. There can be a brief delay, generally under 15 minutes, between submission and the confirmation going out.
- If it’s genuinely missing after that, contact the GST helpdesk with your PAN and submission date handy.
What to Do If Your ARN Status Hasn’t Changed in a While
If your status has been sitting on “Pending for Processing” for more than 10 working days with no movement, here’s what’s likely going on and what to do about it.
It might just be a high-workload jurisdiction. Some officers or regions process a higher volume of applications than others, and that alone can stretch a normal 7-day window out further.
Check your email and SMS again, including spam. A missed clarification notice quietly resets your understanding of where things stand. If a notice went unanswered without your knowledge, that’s a more urgent situation than a routine delay.
Raise a grievance if it’s genuinely stuck. Go to Services, then User Services, then Grievance/Complaint on the GST portal. Include your ARN, submission date, and a screenshot of your current status page. You can also call the GST helpdesk directly with your ARN ready.
Don’t reapply out of frustration. Submitting a fresh application while one is still pending can create duplicate records and complicate things further rather than speeding anything up.
FAQs
How do I do a GST status check by ARN? Go to the GST portal, click Services, then Track Application Status, select Registration, enter your ARN and the captcha, and click Search. No login is required for a first-time registration.
How do I track my GST ARN without logging in? Use the same Track Application Status page under Services on gst.gov.in. It works without login for new registration applications.
What’s the difference between checking ARN status and checking if my GSTIN is active? ARN status tracks a pending application before approval. Once you have a GSTIN, checking whether it’s active, suspended, or cancelled is a separate lookup, done under Search Taxpayer on the portal, not Track Application Status. They’re different tools for different stages.
What does “Pending for Clarification” mean on my ARN status? It means the GST officer has raised a query on your application and needs a response. You have 7 working days to reply through the portal before the risk of rejection increases sharply.
Can I track my GST ARN status using just my TRN? Only if you haven’t submitted your application yet. A TRN tracks a saved draft. Once you submit and get an ARN, that becomes your tracking reference instead.
Why does my GST ARN status say “invalid” or “not found”? Usually a typo. The ARN is case-sensitive with no spaces or hyphens. If you just received it within the last hour, there can also be a short delay before the status tool reflects it.
What happens after my GST ARN status shows “Approved”? Your GSTIN has been issued. Download your registration certificate from the portal, verify your GSTIN shows as Active under Search Taxpayer, and link a valid bank account within 30 days.
This article is for general information only and isn’t a substitute for professional advice. Processing timelines and portal steps can change, and your situation may differ from the examples here. For anything urgent or unclear, check the official GST portal or speak with a tax professional.
Source: The official GST portal (gst.gov.in) Track Application Status page.